John Torode's Chocolate and Coconut Pie- My Kind of Food Review
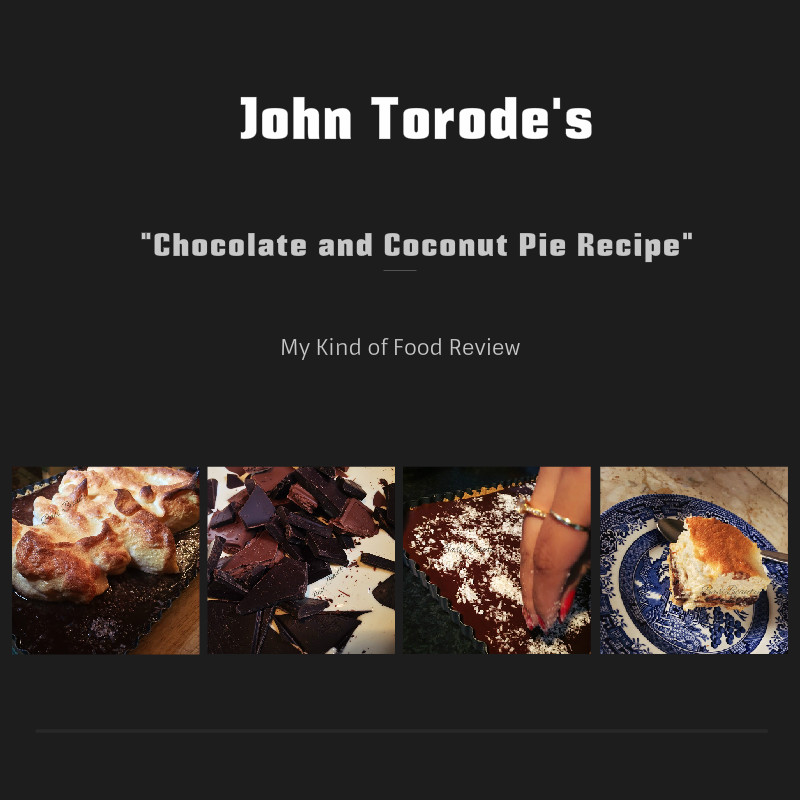
So John is running a competition where bloggers/vloggers cook a recipe from his new book My Kind Of Foodand the winner will win a three hour cooking session with John. I would absolutely LOVE this opportunity with him and I have made a couple of his dishes before and they were so yummy- (Roast halibut with butter beans and chorizo, Big burger).
The recipe for the chocolate and coconut pie is here, however below I have added my own comments and tips for you guys. I made this for a special occasion....my 25th birthday which was last week! It is also national chocolate week, so I thought posting this recipe this week was a good idea.
I know I usually publish healthy alternative but it was my birthday so I consumed a lot of calories (OH WELL)...hope you enjoy!
Chocolate and Coconut Pie
Serves 10-12
Ingredients
-
350g digestive biscuits
- 120g butter, melted
- 55g desiccated coconut,
- 200g milk chocolate, broken into pieces
- 200g dark chocolate, broken into pieces
- 250ml double cream
- 180ml milk
- 100g soft light brown sugar
- 4 egg yolks (keep the egg whites for the meringue)
- 150ml coconut liqueur, such as Malibu
- 40g cornflour
For the meringue:
- 220g caster sugar
- 60ml water
- 4 egg whites
- ½ teaspoon cream of tartar
Method
Place the biscuits, melted butter and 25g of
the desiccated coconut in a food-processor and blitz until they form crumbs. I
found that the mixture to be too crumbly (see below) so I added a bit
more butter until it held together.


- In a large seperate bowl, beat the egg yolks with the coconut liqueur and cornflour.
- Set the bowl over a pan of gently simmering water (making sure the water doesn’t touch the base of the bowl).
- Pour the hot chocolate mixture into the bowl and give it a good stir. What you’re making here is chocolate custard. It says to keep stirring for 5 minutes until thick however 15 minutes of constant stirring this wasn't the case. Therefore in a separate small bowl I:

Pour the custard into the biscuit base and spread it out evenly. Sprinkle with the remaining coconut. I chilled it for around 6 hours (recipe says for 1 hour)

After 6 hours, I decided to make a start on the meringue:
I followed the instructions to make the caramel and the meringue but it was all a bit haywire. I found it difficult to do both things and by the time my merginue was done the caramel had gone hard, so I had to restart. Therefore make the meringue first: use a cold metal bowl (plastic bowls tend to have residue/grease and egg whites don't like it). Whisk the 4 egg whites (from previous) with the cream of tartar, it took me ages to do it by hand so I suggest using an electric whisk, when it forms stiff peaks stop beating- I turned the bowl upside down to check it was done.
For the caramel put the sugar and water into a small pan, bring to the boil and continue to boil for about 5 minutes (don’t stir it) until the sugar has melted and the mixture becomes a light caramel colour, take of the heat and leave to cool for three minutes (no more otherwise it will become very hard!!)

To make the italian meringue. Slowly drizzle and beat the hot sugar into the egg whites (keep beating). Add all the sugar mixture and continue to beat until the meringue is shiny.
Now the recipe states if you don't have a blow torch to heat the oven to 220 degrees celcius and to keep an eye on the meringue as we want it to colour it. However I was really upset. Although I left it in for the specified time the whole pie had melted and was as thin as water (see picture below) :(

- Either use a blow torch, or
- If you haven't got a blow torch- make the meringue as guided but brown on a separate greased proof paper and to add it ontop of the pie.

With the exception of adding more cornflour, I haven't changed the recipe. I have provided you with tips so you don't make the same mistakes as me. I hope you try this yummy pie please tag #basibeauty so I can see your creations.
Kimren xo

Comments
Post a Comment